
Our Real-World Engine Replacement Process: From Safe Recovery to Final Road Testing
Engine failure can turn a reliable daily driver into a major headache overnight—stranding you, racking up towing costs, and forcing tough decisions about repair versus replacement. But opting for a professional replacement Land Roverengine supply and fitting package transforms this setback into a methodical, reassuring process that restores your car better than before. In 2026, established UK specialists typically complete the job in 5–12 working days, factoring in diagnosis, parts sourcing, and thorough testing.
The exact timeline varies with vehicle type—simpler petrol hatchbacks often finish quicker, while complex diesels or turbos take longer. I’ve guided hundreds of owners through these replacements over the years, from Ford Focuses to Transit vans, and the smoothest experiences always come from garages committed to transparency and precision. Understanding each stage empowers you to ask the right questions, spot quality work, and avoid unnecessary delays or costs.
A Complete Breakdown of the Professional Engine Replacement Process
Modern engine replacement UK follows a disciplined sequence, using specialised tools like engine hoists, diagnostic scanners, and torque wrenches to ensure everything meets manufacturer specifications. Skipping or rushing steps leads to leaks, misalignments, or early failures—issues I’ve unfortunately seen from less meticulous workshops. Here’s the full process, explained in detail with insights from real jobs.
Stage 1: Thorough Diagnosis and Professional Recovery
The process never begins with removal—accurate diagnosis comes first to confirm replacement is truly necessary and rule out cheaper fixes like head gaskets or timing issues. Technicians connect OBD scanners to read diagnostic trouble codes (DTCs), perform cylinder compression and leak-down tests, check oil pressure, and often use a bore scope camera to inspect internals for scoring, cracks, or bearing damage.
Only with clear evidence—say, seized pistons or spun bearings—do they proceed. This prevents wasting money on unnecessary swaps. Once approved, recovery service kicks in, usually included in comprehensive packages. Proper flatbed transporters prevent further harm to gearbox, driveshafts, or suspension—unlike basic tow trucks that can cause thousands in extra damage.
Upon workshop arrival, the vehicle is fully documented: high-resolution photos of exterior and under-bonnet condition, mileage verification, and an inventory of accessories. This builds trust and protects against disputes. In one case, these photos helped a client prove pre-existing dent damage wasn’t caused during the job.
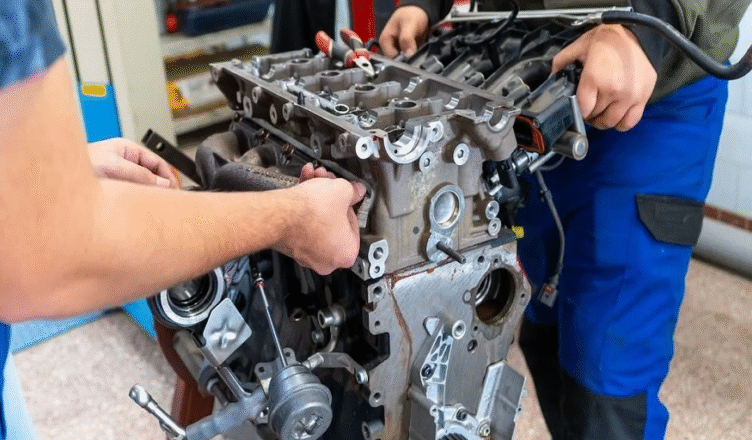
Stage 2: Careful Removal of the Damaged Engine
Removal demands patience and method. All fluids—engine oil, coolant, transmission fluid—are drained responsibly and recycled. Exhaust manifolds, intake systems, fuel rails, wiring harnesses, cooling hoses, and drive belts are disconnected systematically, labelling everything for reassembly.
An overhead engine hoist or dedicated crane lifts the unit smoothly, avoiding strain on bodywork or subframe. This stage frequently uncovers hidden wear: deteriorated rubber mounts allowing excessive vibration, oil-soaked clutches needing renewal, stretched timing chains risking further damage, or corroded coolant pipes.
Reputable garages stop here to discuss discoveries, providing clear quotes for proactive fixes—replacing these while access is easiest saves significant labour later. The removed core unit is assessed for condition; clean, rebuildable cores qualify for surcharge refunds (£300–£1,000 typically), reducing your final bill under standard exchange policies.
Stage 3: Detailed Preparation of Your New Engine
Your reconditioned engine—usually a carefully selected reconditioned or remanufactured unit—arrives with pre-testing, but workshop verification is essential. Technicians check specification match (exact code for ECU compatibility), perform visual inspections for transport damage, hand-spin the assembly to feel for smoothness, and conduct pressure tests.
Reusable components are transferred meticulously: alternator, power steering pump, turbocharger (if equipped), AC compressor, manifolds, and brackets. Standard renewals include full gasket and seal kits, timing belt/chain with tensioners, water pump, thermostat, oil pump where recommended, and often a complete clutch kit on manual vehicles.
Fresh coolant mix, high-quality engine oil, and new filters (oil, fuel, air) are installed. Modern cars require ECU re-programming or module adaptation—matching the new engine to immobiliser, gearbox ECU, and emissions controls. Professionals use dealer-level diagnostics for this, preventing no-start issues or limp mode that plague DIY attempts.
This preparation eliminates most potential problems and ensures the engine integrates seamlessly.
Stage 4: Precision Installation and Controlled Start-Up
Installation reverses removal but with even greater care. The new engine is lowered into perfect alignment, mounts inserted and torqued precisely to spec—over- or under-tightening causes vibration or premature failure.
Every connection is double-checked: hoses clamped securely, electrical plugs cleaned and dielectrically greased against corrosion, exhaust aligned without stress. Cooling systems are filled and bled methodically to remove air pockets, oil circuits primed for instant pressure, and fuel systems purged of air.
Initial start-up is monitored intently—gauges watched for immediate oil pressure build-up, temperature rise, and any leaks or abnormal noises. Diagnostic tools confirm sensor data streams correctly and clear temporary codes from handling.
Stage 5: Rigorous Road-Testing and Final Verification
No vehicle leaves without extensive real-world testing. Multiple drives cover city stop-start, motorway speeds, hill climbs, and heavy loads—checking acceleration, braking engine performance, temperature stability, and absence of smoke or warning lights.
Exhaust smoke tests verify seal integrity, and final scans ensure no new codes. Alignment and brake checks often follow, as engine weight shifts can highlight needs.
Realistic Timeline and Typical Extras (2026 Guide)
| Stage | Typical Duration | Core Activities | Frequently Recommended Extras |
| Diagnosis & Recovery | 1–3 days | DTC reading, compression testing, safe transport | None usually |
| Removal | 1–2 days | Fluid draining, systematic disconnection, hoist lift | Clutch kit, flywheel machining, mount renewal |
| Preparation | 1–3 days | Specification verification, component transfer, renewals | Full timing kit, turbo inspection, coolant pipes |
| Installation | 1–2 days | Precise alignment, connections, initial start | Wiring harness repairs, sensor replacements |
| Testing & Handover | 1–3 days | Multi-condition road tests, final diagnostics | Geometry alignment, brake fluid flush |
Handover and Ongoing Support
Collection includes a comprehensive walk-through: demonstration drive, warranty explanation (12–24 months standard), gentle running-in guidance (avoid full throttle for 500–1,000 miles), and updated service book entries boosting future resale value.
Many specialists offer a free post-fit check after 500 miles—re-torquing mounts and inspecting for settling. This level of care distinguishes excellent garages.
Choosing a VOSA-approved workshop with strong reviews and clear communication ensures your engine supply and fit near me delivers lasting reliability and genuine value in 2026’s rising repair cost landscape.